Design Guide
Format the Page
Safari does not support issue template format settings. You have to configure format, orientation or margins in the print dialog of Safari.
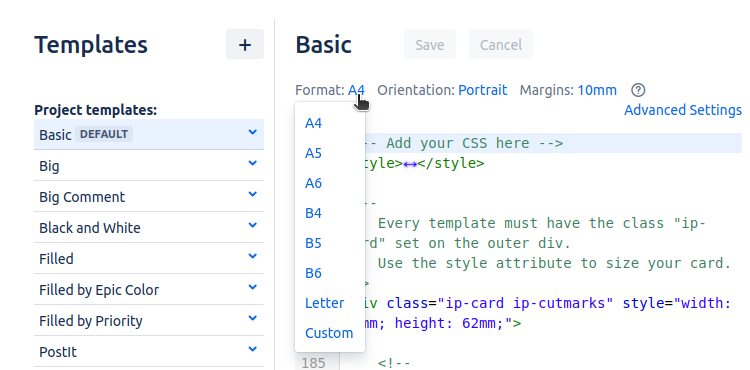
You can store page format settings in your template. The page format is used for preview and printing.

Adjust page format settings
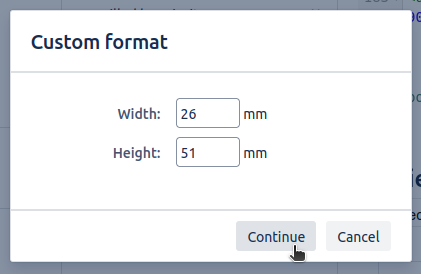
You can choose from a selection of standard paper formats or select the Custom option to specify your own custom paper dimensions.

Specify your own width and height in millimeters.
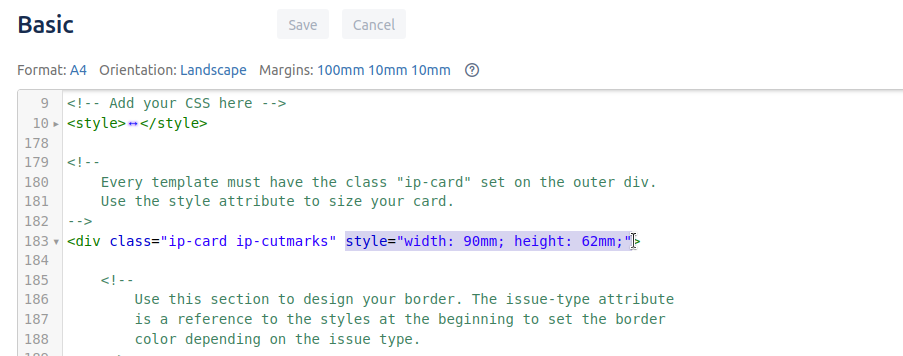
Change the Size of Your Card
To change the size of a predefined template you only have to change the style attribute of the outermost division in the template like shown below.

Adding Fields to Your Card
You can put almost every field onto your card, even custom fields. Most fields are rendered as in the browser by JIRA. Therefore, you may also print your nicely formatted descriptions. You can see a list of available fields in the Help section on the right.

All JIRA system fields are available under the variable issue. All custom fields can be accessed by issue.customfield. If a field exists its value is never null but empty. You can check for field existence by using an if-clause. This is only necessary for custom fields if you want to prevent your template to fail when the custom field is renamed or deleted.
Examples | |
|---|---|
CODE
| Prints the summary of the issue. |
CODE
| Prints the value of the custom field "Sprint". Note that the field must exist, otherwise an error will be thrown. |
CODE
| Prints the value of the custom field "Story Points" if such a field exists. |
CODE
| If your rendered field contains any html you need to set the |
Change the Border of Your Card
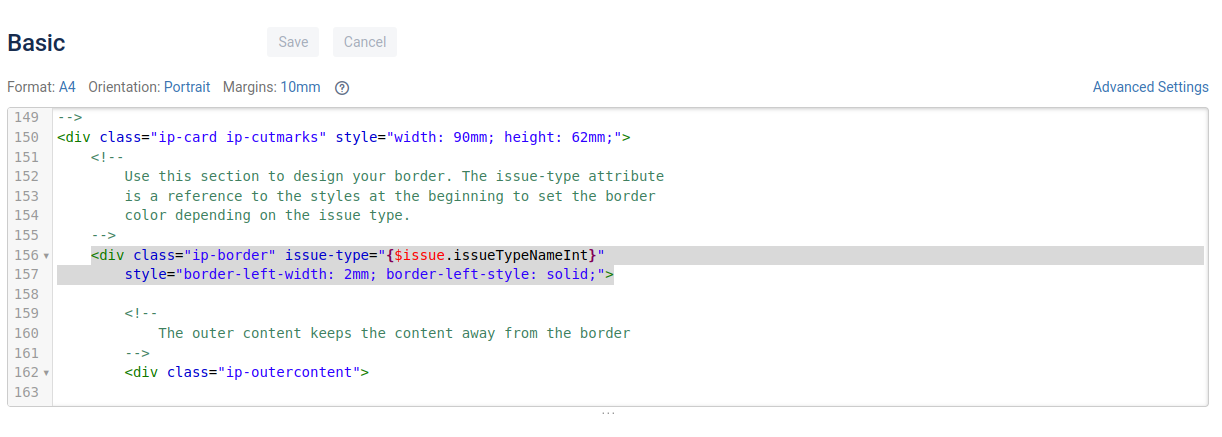
To change the border of a predefined template you need to adjust the border-division of the card. You may also change the appropriate CSS style at the beginning of the template for more advanced borders.

If the border should depend on any value of the issue like the priority or the issue type just use the following:
Give the division a new attribute like "issue-type" and use the appropriate value:
XML<div class="ip-border" issue-type="{$issue.issueTypeNameInt}">Write some CSS rules that depend on the attribute value:
CODEdiv[issue-type='Story'] {lb} border-color:#ffd500; {rb} div[issue-type='Bug'] {lb} border-color:#CC0000; {rb} div[issue-type='New Feature'] {lb} border-color:#ff9933; {rb} div[issue-type='Epic'] {lb} border-color:#888620; {rb} div[issue-type='Task'] {lb} border-color:#bfe4ff; {rb} div[issue-type='Sub-task'] {lb} border-color:#009999; {rb} div[issue-type='Improvement'] {lb} border-color:#009900; {rb} div[issue-type='Technical task'] {lb} border-color:#cc0000; {rb}Note that you have to use
{lb}and{rb}instead of{and}, because{and}cannot be used directly as these are reserved characters in Closure Templates.
Starting from Scratch
If you want to start from scratch, create a new template based on the Blank design. This design only defines some important CSS rules as well as the outermost division. You always need one outermost division with the CSS-class ip-card, otherwise, template rendering will fail.
When designing your template, please be aware that browsers cannot be controlled completely via CSS for printing. You may have to configure the following settings in your browsers print dialog:
print background colors
do not print header/footer of a page
you can also format the page
The template language is Closure Templates so you may do anything that is possible via this template language.
Look at the useful snippets below or the predefined templates to get an idea of possible designs.
Useful Snippets
Card sizing
Wherever you have boxes for content with padding or borders you should apply the following CSS-rule to make it easier to ensure that the card is not enlarged by your border or padding:
box-sizing: border-box;
-moz-box-sizing: border-box;
-webkit-box-sizing: border-box;
Layout
If you want to place content next to each other, tables are the easiest way:
<style type="text/css">
.ip-left {lb}
    text-align: left;
{rb}

.ip-center {lb}
    text-align: center;
{rb}


.ip-right {lb}
    text-align: right;
{rb}
</style>

...

<table>
    <tr>
        <td class="ip-left">Left column</td>
        <td class="ip-center">Middle column</td>
        <td class="ip-right">Right column</td>
    </tr>
</table>